
🧩 값 검증
사용자가 요청을 보냈을 때 올바른 값인지 유효성 검사를 하는 과정
- 검사 위치 : 어느 계층에서 해도 OK이지만 보통 프레젠테이션 계층에서 컨트롤러에 요청이 오는 순간 검증 코드 작성
- 서버의 안정성을 챙길 수 있다.
▷ Java Bean Validation API : 애너테이션 기반 검증 & 데이터 유효성 검사
/* 문자열 다룰 때 사용 */
@NotNull	// null 사용하지 않음
@NotEmpty	// null, 공백/공백만으로 채워진 문자열 허용X
@NotBlank	// null, 공백 허용X
@Size(min=?, max=?)	// 최소 길이, 최대 길이 제한
@Null		// null만 가능


/* 숫자 다룰 때 사용 */
@Positive		// 양수만 허용
@PositiveZero	// 양수와 0만 허용
@Negative		// 음수만 허용
@NegativeZero	// 음수와 0만 허용
@Min(?)			// 최솟값 제한
@Max(?)			// 최댓값 제한


/* 정규식 관련 */
@Email					// 이메일 형식만 허요
@Pattern(regexp="?")	// 직접 작성한 정규식에 맞는 문자열만 허용
1) build.gradle 파일을 열어 의존성을 추가한다.
→ faker : 테스트 진행 시 가짜 데이터(이름,주소,이메일 등) 만드는 오픈소스 라이브러리
dependencies {
	testImplementation 'com.github.javafaker:javafaker:1.0.2'
}
(예제)
Faker faker = new Faker(new Locale("ko"));	// Local을 넣지 않으면 영어로 생성

String name = faker.address().fullAddress();	// 85877 구로읍, 부천구, 부산
String firstName = faker.name.name();			// 홍길동
String lastName =  faker.food.fruit();			// 멜론
2) 검증 로직을 테스트할 테스트 코드를 먼저 작성해보자. (BlogApiControllerTest.java)
// [검증 로직 테스트할 테스트 코드]
@DisplayName("addArticle: 아티클 추가 시 title이 null이면 실패")
@Test
public void addArticleNullValidation() throws Exception {
    // [given] 블로그 글 추가에 필요한 요청 객체 생성
    final String url = "/api/articles";
    final String title = null;  // title은 null로
    final String content = "content";
    final AddArticleRequest userRequest = new AddArticleRequest(title, content);

    final String requestBody = objectMapper.writeValueAsString(userRequest);

    Principal principal = Mockito.mock(Principal.class);
    Mockito.when(principal.getName()).thenReturn("username");

    // [when] 블로그 글 추가 API에 요청 보냄
    ResultActions result = mockMvc.perform(post(url)
            .contentType(MediaType.APPLICATION_JSON_VALUE)  // 요청 타입 : JSON
            .principal(principal)
            .content(requestBody));

    // [then] 응답 코드가 400 Bad Request인지 확인
    result.andExpect(status().isBadRequest());
}

@DisplayName("addArticle: 아티클 추가 시 title이 10자 넘으면 실패")
@Test
public void addArticleSizeValidation() throws Exception {
    // [given] 블로그 글 추가에 필요한 요청 객체 생성
    Faker faker = new Faker();

    final String url = "/api/articles";
    final String title = faker.lorem().characters(11);  // title에 11자의 문자 들어가게 설정
    final String content = "content";
    final AddArticleRequest userRequest = new AddArticleRequest(title, content);

    final String requestBody = objectMapper.writeValueAsString(userRequest);

    Principal principal = Mockito.mock(Principal.class);
    Mockito.when(principal.getName()).thenReturn("username");

    // [when] 블로그 글 추가 API에 요청 보냄.
    ResultActions result = mockMvc.perform(post(url)
            .contentType(MediaType.APPLICATION_JSON_VALUE)  // 요청 타입 : JSON
            .principal(principal)
            .content(requestBody));

    // [then] 응답 코드가 400 Bad Request인지 확인
    result.andExpect(status().isBadRequest());
}
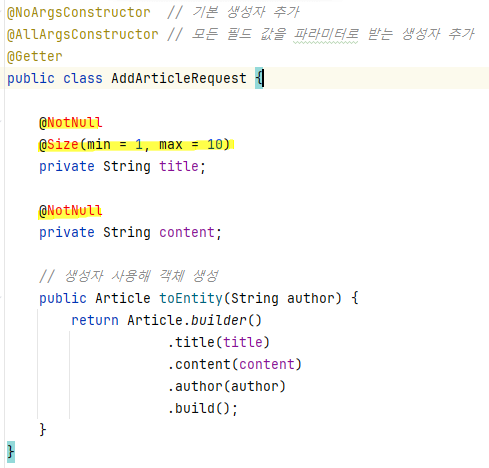
3) AddArticleRequest.java 파일 열어 값 검증 애너테이션을 추가하자.
(블로그 글 추가 요청을 받을 때 사용하는 DTO)
4) BlogApiController.java 파일을 열어 메서드에 들어오는 파라미터가 유효한 값인지 확인하도록 수정하자
(블로그 글 추가 요청을 받는 파일)
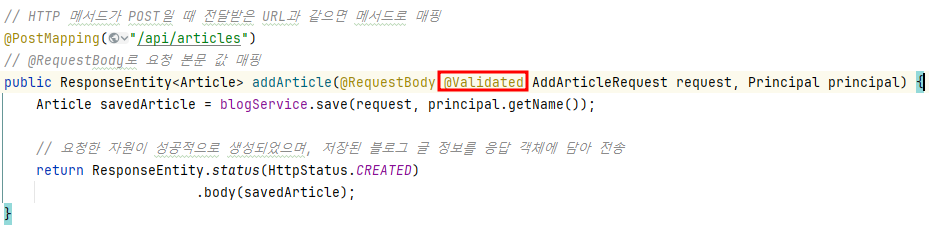
→ @Validated 애너테이션 : 메서드에 들어오는 파라미터가 유효한 값인지 검증
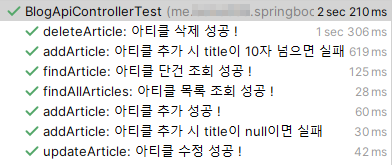
[결과]
🧩 예외 처리
1. DefaultErrorAttributes
- 추가 정보 담고 싶다면 ErrorAttributes를 구현(extends)해 빈으로 등록하면 구현한 ErrorAttributes에 맞게 에러 메시지 생성 가능
2. 에러 메시지용 객체 만들어 사용
🔸기존의 예외 처리 로직 대비 장점
① 예외 이름 보고 왜 발생한 예외인지 파악 가능
② 예외 한 곳에서 관리 가능
1) config 디렉터리에 error 디렉터리를 만들고 ErrorCode라는 이름 가진 enum 생성하기 (ErrorCode.java)
→ 에러코드를 한 곳에 모아 관리하기 위한 enum
@Getter
public enum ErrorCode {
    INVALID_INPUT_VALUE(HttpStatus.BAD_REQUEST, "E1", "올바르지 않은 입력값입니다."),
    METHOD_NOT_ALLOWED(HttpStatus.METHOD_NOT_ALLOWED, "E2", "잘못된 HTTP 메서드를 호출했습니다."),
    INTERNAL_SERVER_ERROR(HttpStatus.INTERNAL_SERVER_ERROR, "E3", "서버 에러가 발생했습니다."),
    NOT_FOUND(HttpStatus.NOT_FOUND, "E4", "존재하지 않는 엔티티입니다."),

    ARTICLE_NOT_FOUND(HttpStatus.NOT_FOUND, "A1", "존재하지 않는 아티클입니다.");

    private final String message;

    private final String code;
    private final HttpStatus status;

    ErrorCode(final HttpStatus status, final String code, final String message) {
        this.status = status;
        this.code = code;
        this.message = message;
    }
}
2) 에러 메시지용 객체 ErrorResponse.java를 생성해 다음과 같이 입력한다.
(ErrorAttributes 대체)
@Getter
@NoArgsConstructor(access = AccessLevel.PROTECTED)
public class ErrorResponse {

    private String message;
    private String code;

    private ErrorResponse(final ErrorCode code) {
        this.message = code.getMessage();
        this.code = code.getCode();
    }

    public ErrorResponse(final ErrorCode code, final String message) {
        this.message = message;
        this.code = code.getCode();
    }

    public static ErrorResponse of(final ErrorCode code) {
        return new ErrorResponse(code);
    }

    public static ErrorResponse of(final ErrorCode code, final String message) {
        return new ErrorResponse(code, message);
    }
}
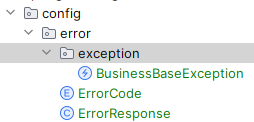
3) error 디렉터리에 exception 디렉터리를 새로 만들고, BusinessBaseException.java 파일을 생성해 아래와 같이 입력한다.
→ 비즈니스 로직을 작성하다 발생하는 예외를 모아두는 최상위 클래스
: RuntimeException ⊃ BusinessBaseException ⊃ NotFoundException, UnauthorizedException, DuplicateKeyException (중복 키에 대한 예외 처리)
package me.bono039.springbootblog.config.error.exception;

import me.bono039.springbootblog.config.error.ErrorCode;

public class BusinessBaseException extends RuntimeException {

    private final ErrorCode errorCode;

    public BusinessBaseException(String msg, ErrorCode errorCode) {
        super(msg);
        this.errorCode = errorCode;
    }

    public BusinessBaseException(ErrorCode errorCode) {
        super(errorCode.getMessage());
        this.errorCode = errorCode;
    }

    public ErrorCode getErrorCode() {
        return errorCode;
    }
}
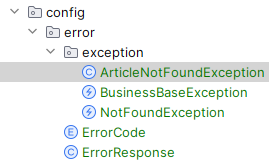
4) exception 디렉터리에 NotFoundException.java, ArticleNotFoundException.java 파일 만들어 다음과 같이 코드를 작성한다.
public class NotFoundException extends BusinessBaseException {

    public NotFoundException(ErrorCode errorCode) {
        super(errorCode.getMessage(), errorCode);
    }

    public NotFoundException() {
        super(ErrorCode.NOT_FOUND);
    }
}
public class ArticleNotFoundException extends NotFoundException {
    public ArticleNotFoundException() {
        super(ErrorCode.ARTICLE_NOT_FOUND);
    }
}
5) error 디렉터리에 GlobalExceptionHandler.java 파일 만들어 다음과 같이 코드를 작성한다. (예외 처리 핸들러)
@Slf4j
@ControllerAdvice   // 모든 컨트롤러에서 발생하는 예외를 잡아서 처리
public class GlobalExceptionHandler {
    @ExceptionHandler(HttpRequestMethodNotSupportedException.class) // HttpRequest... 예외 잡아 처리
    protected ResponseEntity<ErrorResponse> handle(HttpRequestMethodNotSupportedException e) {
        log.error("HttpRequestMethodNotSupportedException", e);
        return createErrorResponseEntity(ErrorCode.METHOD_NOT_ALLOWED);
    }

    @ExceptionHandler(BusinessBaseException.class)
    protected ResponseEntity<ErrorResponse> handle(BusinessBaseException e) {
        log.error("BusinessBaseException", e);
        return createErrorResponseEntity(e.getErrorCode());
    }

    @ExceptionHandler(Exception.class)
    protected ResponseEntity<ErrorResponse> handle(Exception e) {
        e.printStackTrace();
        log.error("Exception", e);
        return createErrorResponseEntity(ErrorCode.INTERNAL_SERVER_ERROR);
    }

    private ResponseEntity<ErrorResponse> createErrorResponseEntity(ErrorCode errorCode) {
        return new ResponseEntity<>(
                ErrorResponse.of(errorCode),
                errorCode.getStatus());
        )
    }
}
HttpRequestMethodNotSupportedException
- 지원하지 않은 HTTP 메서드 호출 시 발생하는 예외
- 응답코드 : 405
BusinessBaseException
- 정의한 예외가 아니라면 발생하는 예외
- 응답코드 : 500
6) BlogApiControllerTest.java 파일 열어 테스트 코드 작성
@DisplayName("findArticle: 잘못된 HTTP 메서드로 아티클 조회하려고 하면 조회 실패")
@Test
public void invalidHttpMethod() throws Exception {
    // [given]
    final String url = "/api/articles/{id}";

    // [when]
    final ResultActions resultActions = mockMvc.perform(post(url, 1));

    // [then]
    resultActions
            .andDo(print())
            .andExpect(status().isMethodNotAllowed())
            .andExpect(jsonPath("$.message").value(ErrorCode.METHOD_NOT_ALLOWED.getMessage()));
}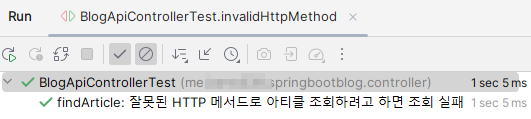
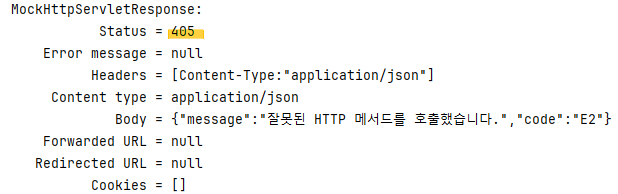
- GET 요청 처리하는 컨트롤러만 있는 URL에 HttpRequestMethodNotSupportedException 예외가 발생할 POST 요청 보냄.
- 테스트 코드 실행 시, METHOD_NOT_ALLOWED 에러 코드 정의한 상태 코드인 405 응답과 에러 메시지 보냄
- andDo(print() : 실제 응답이 어떻게 나오는지 콘솔 로그에서 확인 가능
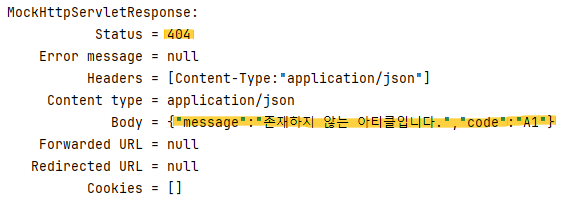
7) BlogApiControllerTest.java 파일 열어 지금 어떤 응답이 오고 있는지 확인하기 위한 테스트 코드 작성
@DisplayName("findArticle: 존재하지 않는 아티클 조회하려고 하면 조회 실패")
@Test
public void findArticleInvalidArticle() throws Exception {
    // [given]
    final String url = "/api/articles/{id}";
    final long invalidId = 1;

    // [when]
    final ResultActions resultActions = mockMvc.perform(get(url, invalidId));

    // [then]
    resultActions
            .andDo(print())
            .andExpect(status().isNotFound())
            .andExpect(jsonPath("$.message").value(ErrorCode.ARTICLE_NOT_FOUND.getMessage()))
            .andExpect(jsonPath("$.code").value(ErrorCode.ARTICLE_NOT_FOUND.getCode()));
}
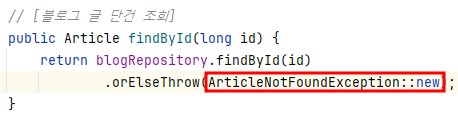
이 테스트를 실행하려면, BlogService.java 열어 id에 해당하는 레코드가 없으면 ArticleNotFoundException 예외를 던지도록 수정한다.
[결과]

이로써 진짜 끝~!~!

(해당 글 내용은 📗 스프링 부트 3 백엔드 개발자 되기 - 자바 편을 읽고 정리한 내용입니다.)
'📚 관련 독서 > 스프링 부트 3 백엔드 개발자 되기 - 자바 편' 카테고리의 다른 글
| [SpringBoot] 12장 CI/CD 도입하기 (0) | 2024.02.27 |
|---|---|
| [SpringBoot] 11장 AWS에 프로젝트 배포하기 (0) | 2024.02.22 |
| [SpringBoot] 10장 OAuth2 ver. 로그인/로그아웃 구현 (0) | 2024.02.21 |
| [SpringBoot] 09장 JWT ver. 로그인/로그아웃 구현 (0) | 2024.02.13 |
| [SpringBoot] 08장 스프링 시큐리티 ver. 로그인/로그아웃, 회원 가입 구현 (0) | 2024.02.13 |